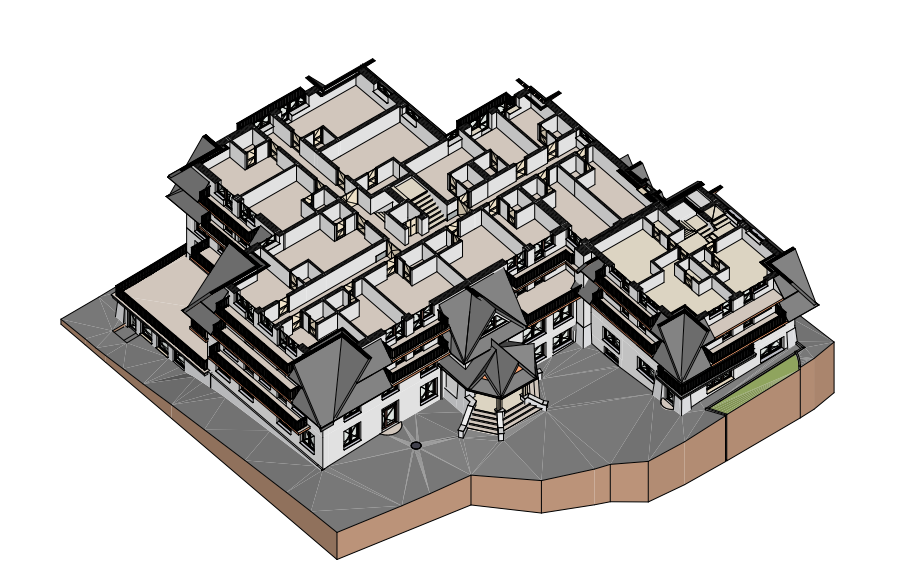
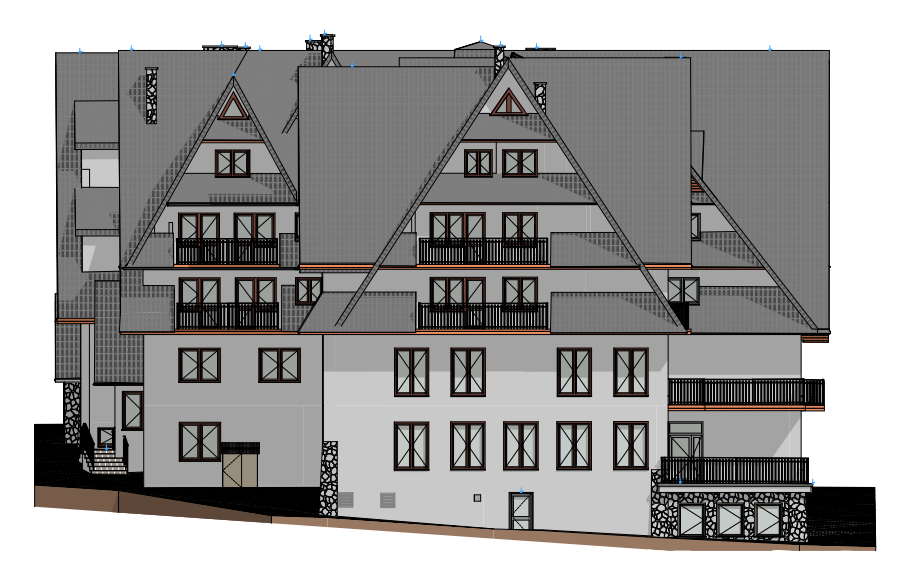
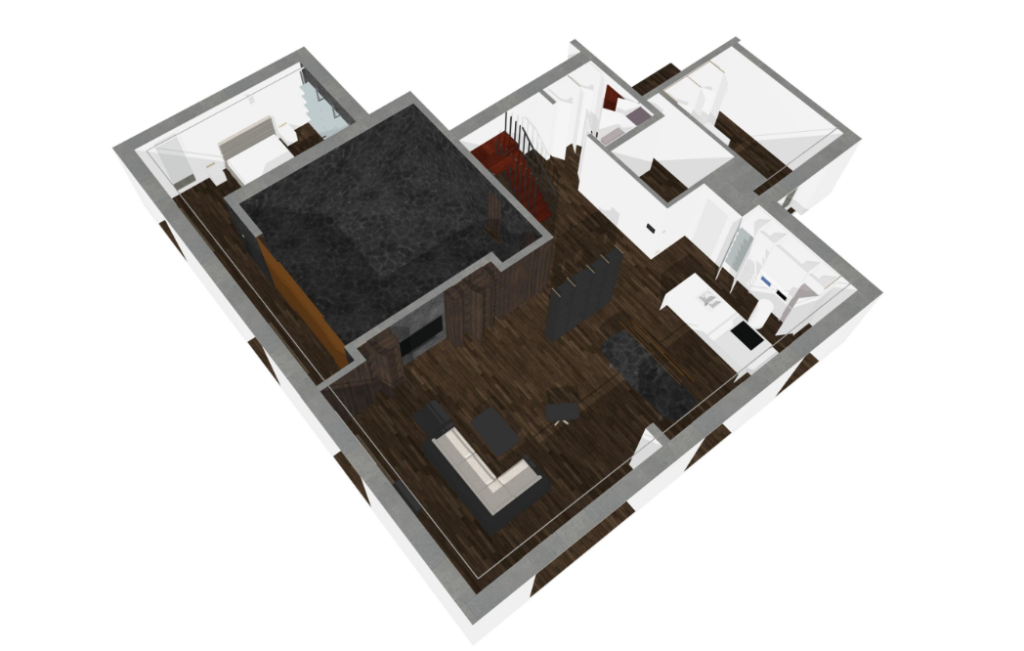
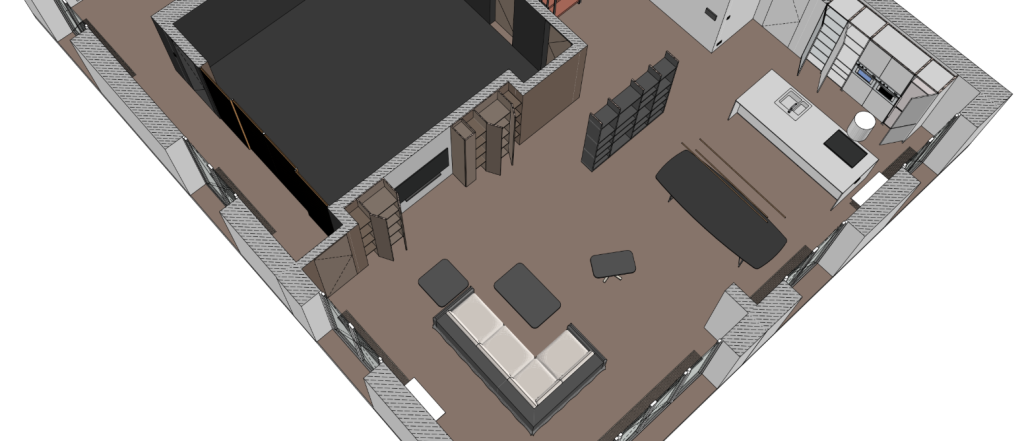
Scan to BIM Outsourcing — A Fast, Accurate Way to Turn Reality Into Actionable BIM Data

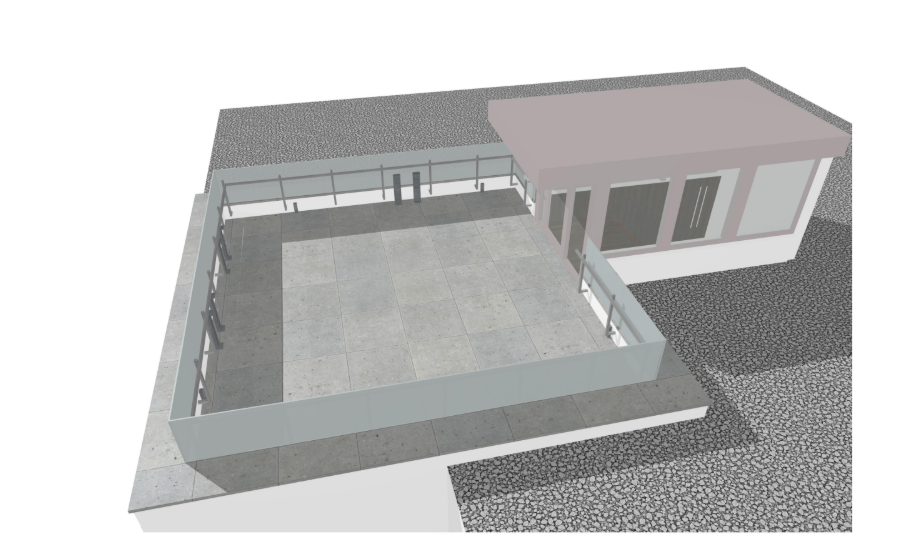
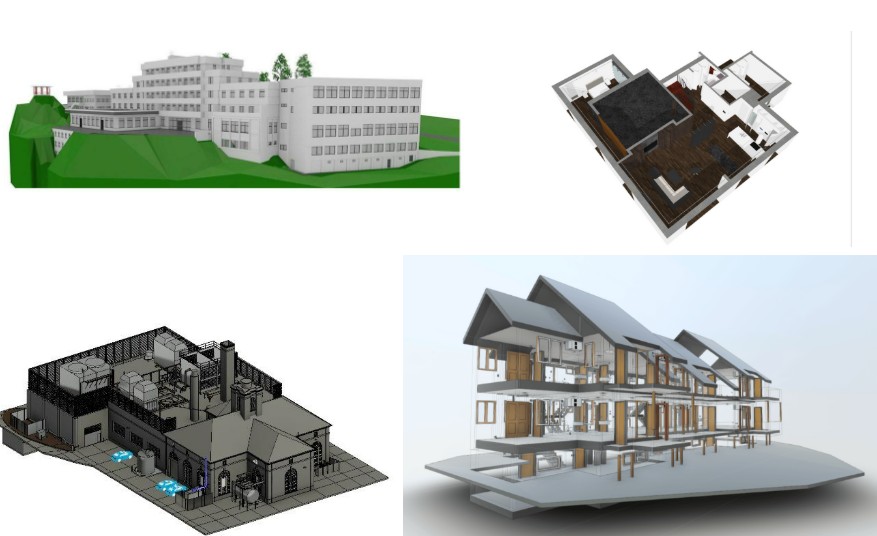
ScanM2 offers a seamless scan-to-BIM outsourcing workflow. These end-to-end BIM outsourcing and modeling services are carried out entirely in-house by our U.S. team and are available nationwide as streamlined BIM outsourcing services in USA.

When you choose ScanM2, you work directly with specialists among professional BIM outsourcing companies in USA—no middlemen, no hand-offs, just accurate data delivered on time and on budget.

Why Scan-to-BIM Is the Smartest Form of BIM Outsourcing

  1. Lean budgets, zero overhead. You get a full-stack BIM team for a fraction of the cost of hiring, training, and licensing in-house staff.
  1. Field-to-model in days, not weeks.
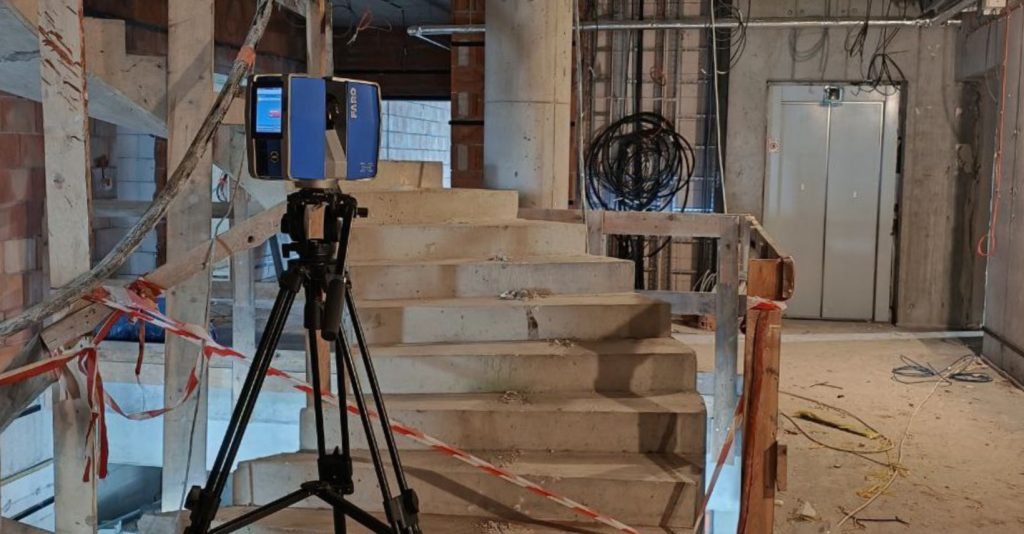
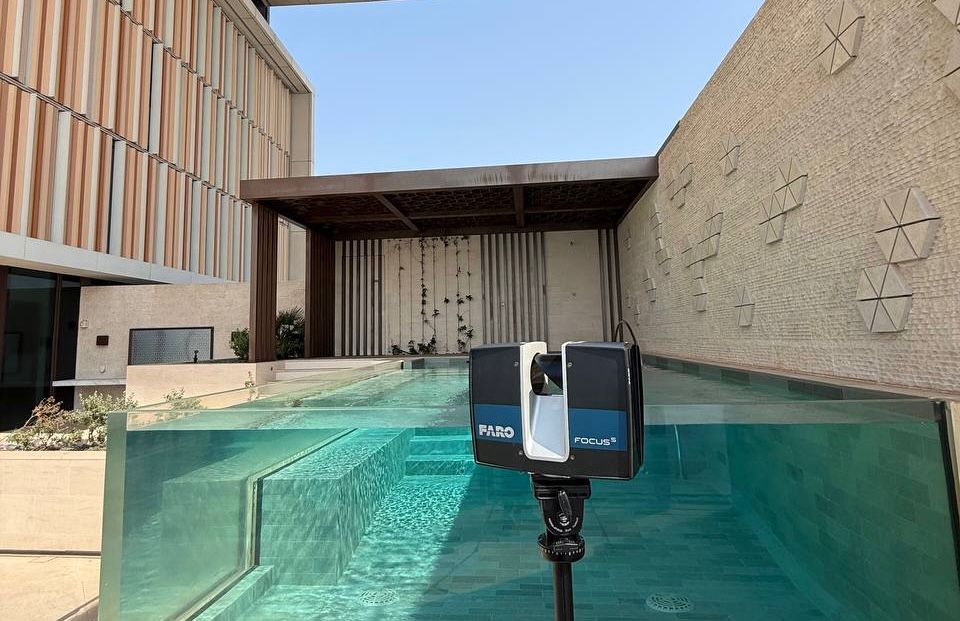
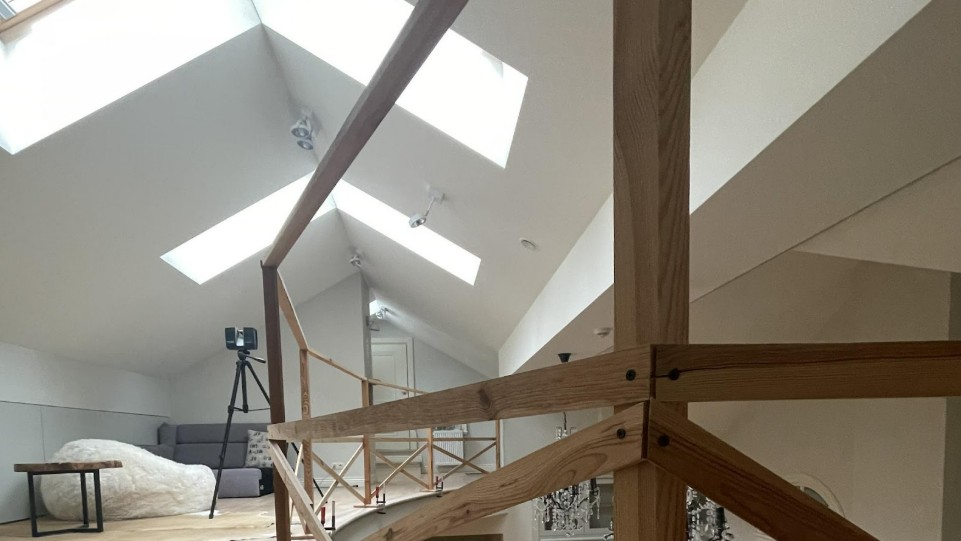
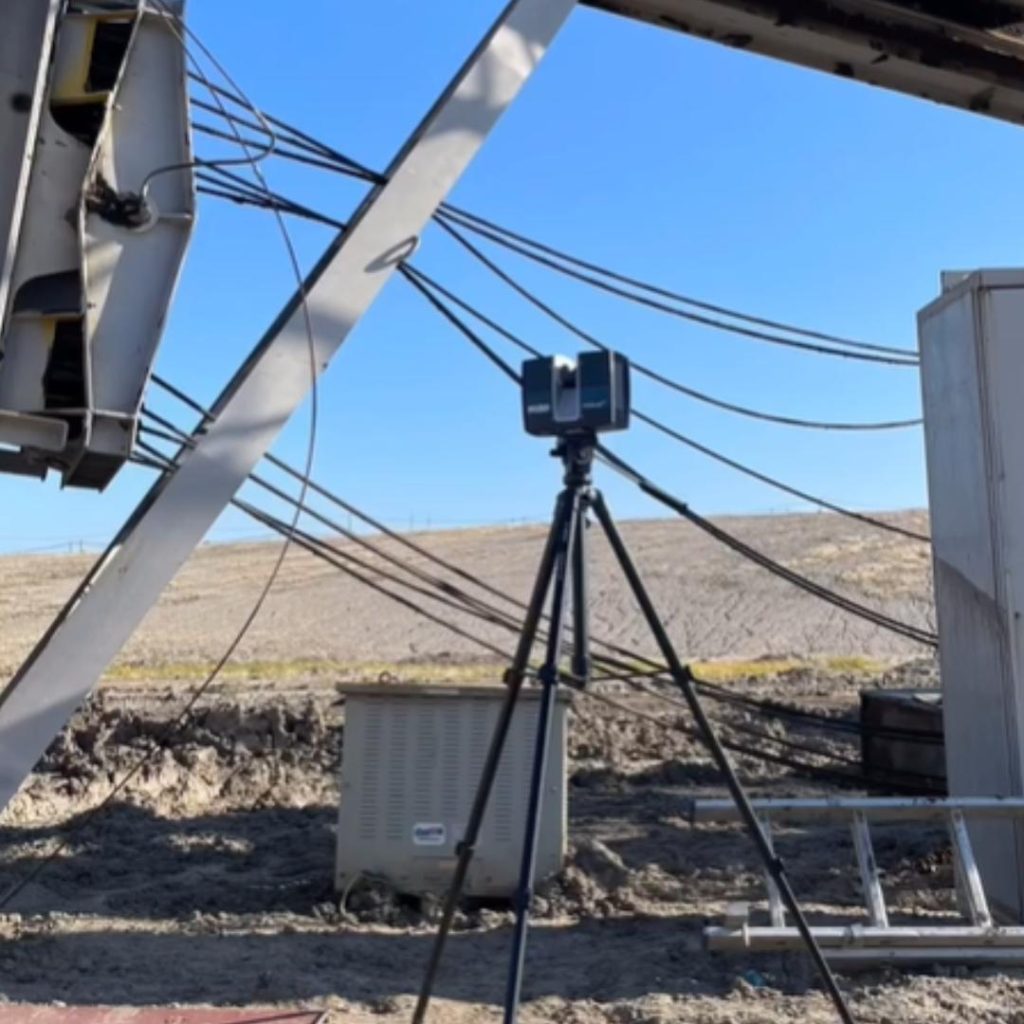
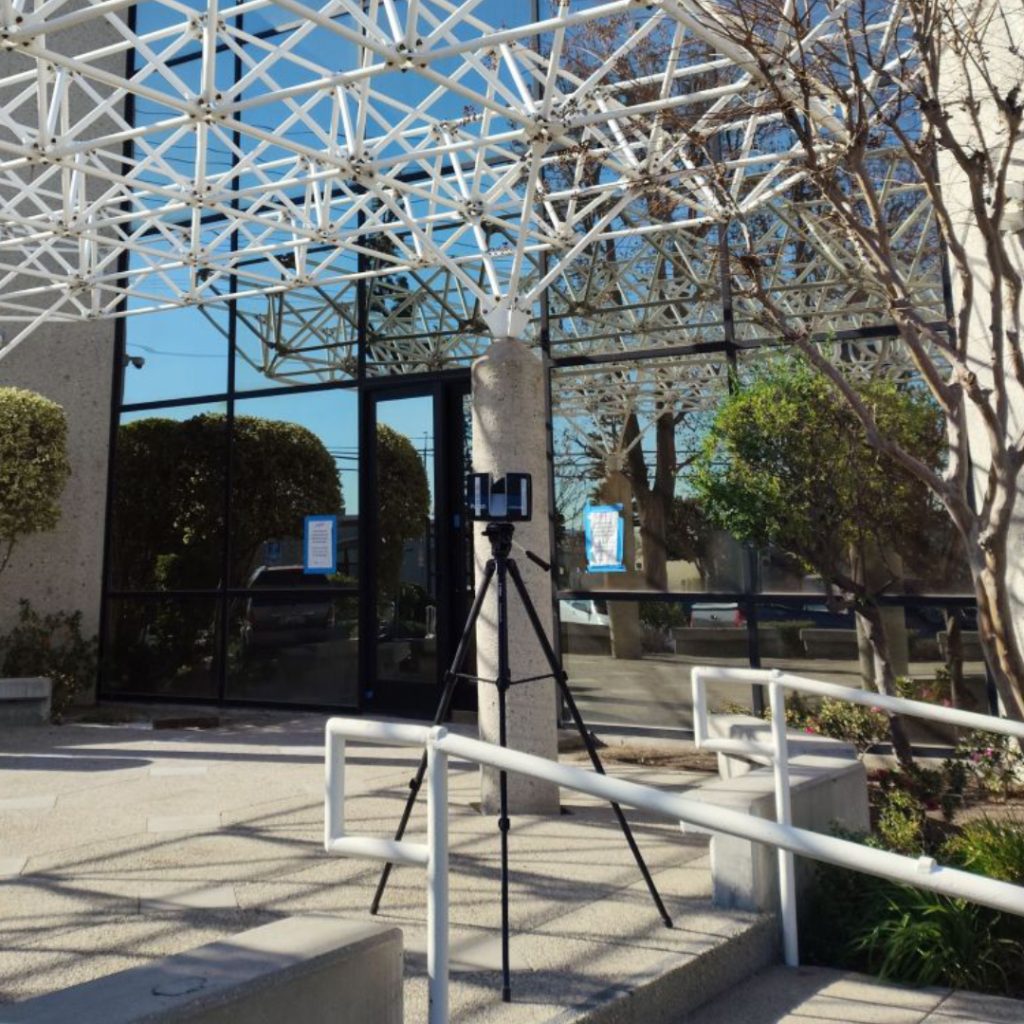
  • Tripod & mobile LiDAR. Our fleet—two FARO Focus 3D units, a Trimble X7, and a Leica C10 scanning total station—pairs long-range accuracy with SLAM mobility, capturing up to 2 million points per second for seamless interior-and-exterior coverage.
  • Handheld scanner. A lightweight handheld unit slips into tight shafts and congested MEP corridors, adding sub-millimetre detail where tripod rigs can’t fit.
    Automated post-processing and disciplined QA still shave 25-30 % off typical delivery times.
  1. Reliability you can build on. Our workflows meet AIA LOD 100-400 and ISO 19650; deliverables export natively to Revit, Archicad, and SolidWorks with clean IFC for friction-free coordination across architects, GCs, and FM platforms.

How These Services Move Your Project Forward

  • Risk-free scope clarity. A fixed, documented BIM deliverable schedule lets architects and GCs plan downstream work with confidence—no surprises, no re-measuring.
  • Instant capacity boost. Outsourcing adds a fully staffed BIM cell to your team overnight, so bidding on larger or concurrent projects no longer stretches internal resources.
  • Budget control. You pay only for scoped output—hardware, software, payroll taxes, and training stay off your balance sheet.
  • Faster coordination. Clash-free Revit/IFC models drop straight into Navisworks or Archicad, accelerating design reviews and cutting RFIs on site.

In short, our scan-to-BIM and 2D-to-BIM services de-risk early phases, compress schedules, and let you scale without permanent overhead—so you can focus on design intent and client satisfaction while we handle the data.

Our Core BIM Outsourcing & Modeling Services

ServiceWhat We DeliverTypical Use-Cases
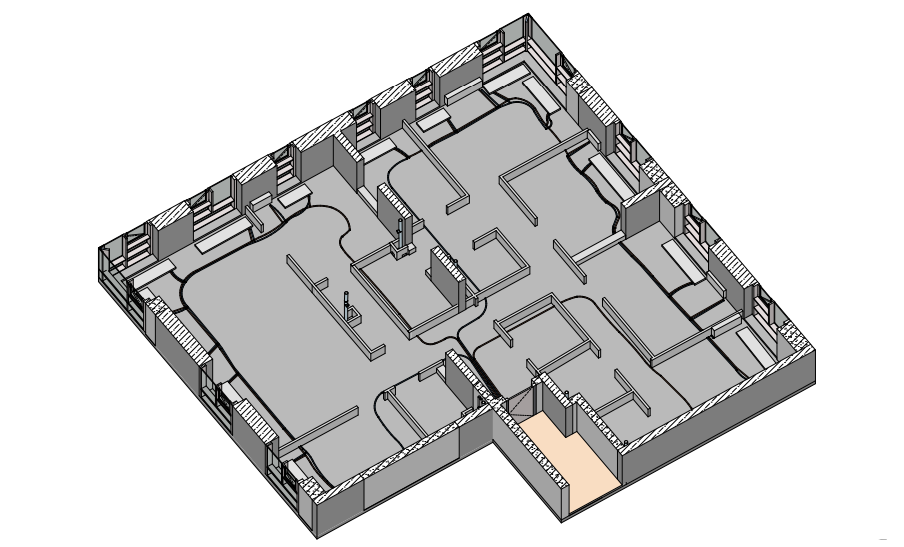
Scan to BIMPoint-cloud processing & RevitIFC model (LOD 200-400)Existing-condition capture, heritage, as-builts
2D-to-BIM ConversionIntelligent BIM model from legacy DWGPDF plansArchitects without internal BIM teams
As-Built BIMVerified model after construction hand-overOwners & facility managers
BIM for MEPFabricationDiscipline-specific models ready for coordinationTrade contractors & fabricators

All services are available nationwide as bim outsourcing services in usa, either fully remote or with on-site capture anywhere in the United States.

A Transparent, Six-Step Collaboration Workflow

  • Project brief. You share drawings, specs, or simply a short description of the asset—scope, area, deadlines.
  • Fixed-price offer. Within 24 hours you receive a scope matrix, timeline, and lump-sum quote.
  • Nationwide scanning. Our field crew travels to site, captures exterior and interior geometry, and produces detailed photo documentation.
  • Point-cloud processing. Raw scans are aligned, noise-filtered, and clipped to project extents.
  • BIM modeling. Architectural, structural, and (optionally) MEP elements are built to the agreed LOD.
  • Delivery & support. You receive RVT, IFC, or NWC files plus a viewer-ready cloud link, and our team remains on call for any follow-up questions. This mirrors the phased scan → model approach proven on previous projects​​

Scanning Technology & Expected Accuracy

Our capture workflow combines stationary tripod scanners and a hand-held LiDAR unit, all from the industry’s most trusted manufacturers – Leica, Trimble, and FARO.

PlatformTypical Working RangePosition AccuracyWhy It Matters
Tripod LiDAR (Leica & FARO)up to 300 ft / 90 m± 2 mm within 80 mLong‑range, high‑density scans for façades, atria, and industrial halls
Survey‑grade Tripod (Trimble)up to 260 ft / 80 m± 2 mm plus automated in‑field calibrationMeets strict survey control and QA requirements
Hand‑held LiDAR0–50 ft / 15 msub‑millimetre detail at close rangeReaches tight shafts, congested MEP corridors, and ceiling voids

The blended dataset yields a uniform, noise-filtered point cloud with enough density for clash-free BIM at LOD 200-400. All instruments feature redundant onboard storage and self-diagnostics, ensuring data integrity and equipment reliability even on multi-day, multi-site campaigns.

Flexible, Project-Based Pricing

Every project is unique, so pricing scales with:

  • Floor-calculated surface area (gross floor area or façade square footage)
  • Number and complexity of building systems (MEP, process, specialty installs)
  • Quantity of high-detail components (ornamental, historic, industrial assets)

Send us a brief and we’ll return a custom estimate—no hidden fees, no licensing surcharges.

Ready to Work With One of the Leading bim outsourcing companies in USA


Share your project brief – scope, floor area or façade size, deadlines, and any existing drawings or scans – and, once we have the full information, we’ll turn around a fixed-price commercial offer within 24 hours.

Check our activity on:

Reverse Engineering in the Automotive Industry: From a Classic Corvette to Electric Buses

Reverse engineering is gaining increasing relevance in the automotive sector – from reconstructing unavailable parts to developing modern aerodynamic components and electrifying existing vehicles. Thanks to 3D scanning for reverse engineering, it is possible not only to recreate a physical object, but also to prepare technical documentation and production-ready data.

At SCANM2, we have carried out dozens of such projects. Below we present three representative examples.

1. Reconstruction of a Corroded Body Part of a Classic Car: Chevrolet Corvette

A specialist in the restoration of vintage vehicles contacted us with a request to recreate a body element in a classic Chevrolet Corvette (from the 1960s) that had suffered from extensive corrosion. The original part was no longer available, and neither technical documentation nor replacement parts could be sourced.

What we did:

  • We performed reverse engineering scanning using a handheld 3D laser scanner with an accuracy of 0.02 mm.
  • Based on the point cloud, we developed a detailed 3D model in STL format.
  • The client used the model to create a mold and manufactured the component from new-generation composites – carbon fiber and epoxy resin.

Result: The new part matched the original bodywork perfectly, and the entire process took less than two weeks. Thanks to reverse engineering with 3D laser scanning, we successfully recreated a component that had long disappeared from the market.

2. Measurement of a Bus Undercarriage for Electric Conversion

A technology company working on converting combustion engine vehicles to electric power approached us to carry out precise measurements of a city bus undercarriage.

What we did:

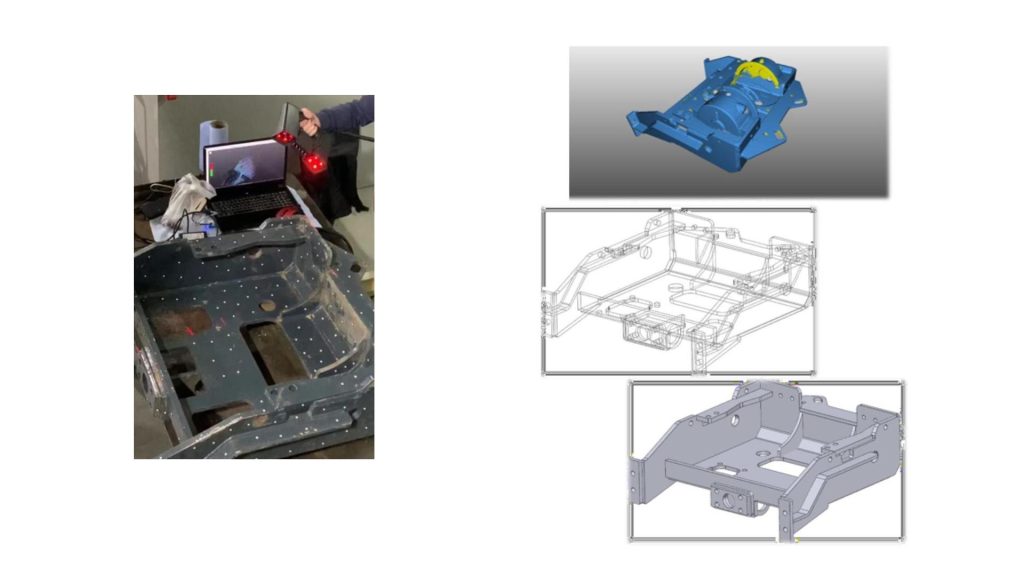
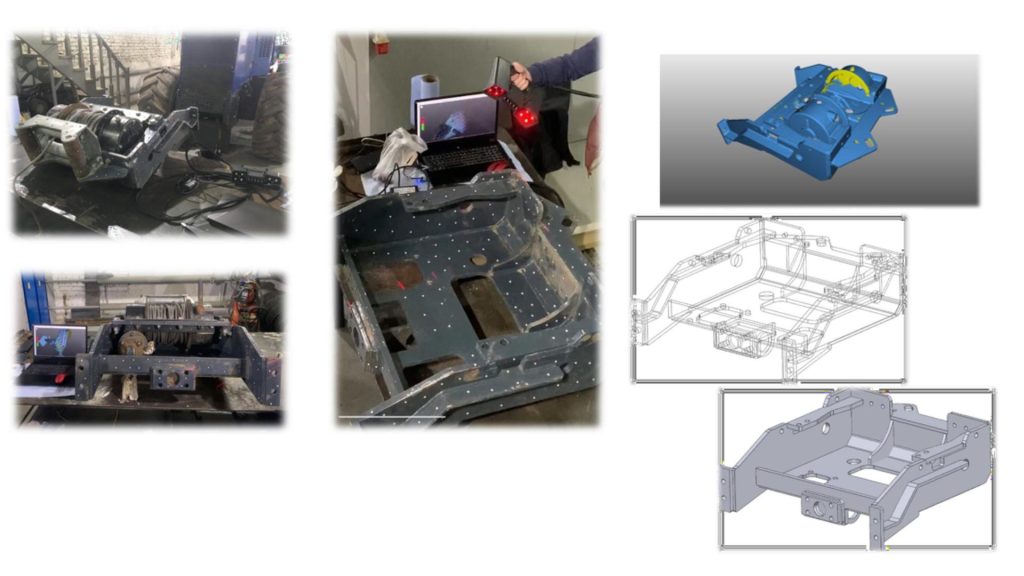
  • We performed a full 3D laser scan of the undercarriage.
  • The measurement accuracy was 0.1 mm, allowing us to capture all mounting points, curvatures, and the complete geometry of the frame.
  • We delivered a complete data package: a 3D model, 2D drawings, and technical documentation.

Result: The client was able to design their own battery module and installation system, which fit perfectly with the original structure. This avoided the need for costly modifications.

3. Development of a New Aerodynamic Bumper for a Heavy Vehicle

A design team developing aerodynamic bumpers for trucks needed an accurate 3D model of a specific vehicle to create a new component that would improve airflow and reduce fuel consumption.

What we did:

  • We scanned the heavy-duty vehicle (brand anonymized due to RODO regulations).
  • Using spatial data, we built a precise CAD model.
  • The client’s designers created a prototype bumper, which was then 3D printed using FDM technology and tested in real conditions.

Result: Thanks to 3D reverse engineering, the client reduced design time by 40% and avoided expensive design errors.

How SCANM2 Supports the Automotive Sector

As a company specializing in reverse engineering services, we offer:

  • 3D scanning of vehicles and their components,
  • preparation of STL/STEP/DWG models,
  • 2D and 3D documentation for workshops, manufacturers, and design teams,
  • fit and collision analysis,
  • component optimization for manufacturing.

The 3D scanners for reverse engineering we use ensure high precision and enable non-invasive work even with very delicate parts.

Do You Have an Unusual Vehicle or Prototype?

Contact us – we will provide a free quotation, and our engineers will recommend the most effective solution. With SCANM2, even the oldest vehicle can be brought back to life with the help of 3D reverse engineering.

Check our activity on:

3D Scanning for Reverse Engineering and Technical Documentation

Unlock Engineering Precision with Reverse Engineering

Reverse engineering with 3D scanning is essential when original technical documentation is missing, incomplete, or outdated. At SCANM2, we help engineers, manufacturers, and construction professionals retrieve precise geometric and functional data from existing components. Our deliverables include high-accuracy CAD models, technical drawings, and as-built documentation — all ready for production, simulation, or redesign.

Precision 3D Scanning Solutions

We utilize high-performance 3D laser scanning equipment from trusted manufacturers such as FARO, Leica, Trimble, and handheld systems, delivering accuracy down to millimeters or even microns. This allows for precise data collection across various industries, including mechanical engineering, infrastructure development, and industrial plant operations.

Our scanners are ideal for:

  • Complex geometric components
  • Large-scale industrial systems
  • Interior and exterior structures
  • Pipe networks and machinery layouts

Engineering Documentation Based on Point Cloud Data

At the heart of reverse engineering through 3D scanning lies the point cloud — a digital 3D representation of a physical object composed of millions of spatial data points that accurately capture its geometry.

After scanning, the raw point cloud is processed using specialized software (such as Faro Scene, Autodesk ReCap, Geomagic, or PolyWorks), where:

  • multiple scans are cleaned, aligned, and merged into a single, unified dataset;
  • the data is converted into a mesh (triangulated surface) or directly used to create solid and surface CAD models;
  • detailed 2D drawings and 3D CAD models are generated in accordance with engineering standards such as ASME and ISO.

The accuracy of the resulting documentation depends on the scanner type and environmental conditions — laser scanning typically achieves precision in the range of ±0.01 mm to ±0.1 mm.

This level of detail enables:

  • the creation of engineering-grade technical drawings,
  • the design of replacement or retrofit parts,
  • the development of assembly plans and manufacturing files,
  • and deviation analysis between the as-built object and original design (for quality control).

We deliver complete documentation packages derived from point clouds — tailored for production, maintenance, verification, and design applications. Whether you’re reverse engineering a legacy part or capturing an entire facility, this workflow ensures both speed and dimensional integrity.

Understanding the Engineering Value of Reverse Engineering

Reverse engineering is more than just a method of replicating parts — it’s a critical engineering practice that bridges the gap between physical products and their digital twins. By integrating 3D scanning with modern CAD workflows, engineers gain a powerful toolset for understanding and controlling complex systems throughout the product lifecycle.

Engineering Applications Across the Lifecycle

Product Maintenance & Service Life Extension


When technical documentation is missing or outdated, reverse engineering enables engineers to extract accurate geometry and material data from physical parts. This is essential for spare part fabrication, preventive maintenance, or refurbishing legacy systems.

Design Optimization & Redesign

Access to precise 3D models allows engineers to conduct design audits, identify geometric inefficiencies, and apply parametric changes without redoing the entire design process from scratch. Reverse-engineered models can serve as the base for improved, lighter, or more functional iterations.

Simulation & Validation


With digital models derived from real-world components, teams can run finite element analysis (FEA), computational fluid dynamics (CFD), and tolerance simulations to assess mechanical integrity, performance, and failure points — even when no original design files exist.

Component Interfacing & System Integration


Accurate digital representations of physical components are crucial for integrating old parts with new ones in hybrid systems, ensuring mechanical fit and functional alignment within larger assemblies.

Retrofitting & Upgrades

Industrial plants, transport systems, and mechanical infrastructure often require upgrades without full system replacements. Reverse engineering supports custom-fit component design and interface compatibility, reducing downtime and retrofit risks.

Benefits for Engineers

  • Time Savings: Minimize guesswork and manual measurement with instant, high-resolution 3D data
  • Accuracy: Capture every detail, including worn or deformed surfaces
  • Data Portability: Export in all standard engineering formats for seamless collaboration
  • Adaptability: Apply results to mechanical, electrical, and mechatronic projects

Reverse engineering is not a workaround — it’s a strategic engineering capability that enhances product development, maintenance strategies, and system intelligence.

Reverse Engineering Workflow

Our streamlined engineering workflow guarantees accuracy, repeatability, and traceable documentation at every stage:

1. Project Consultation

We begin by defining the project’s scope: type of component, location, technical requirements, level of detail (LOD), and delivery format.

2. 3D Scanning

Our team performs on-site or off-site laser scanning, generating accurate point-cloud data from physical components.

3. Data Processing

Collected data is aligned, cleaned, and optimized, ensuring geometric integrity and preparing it for further modeling and documentation.

4. CAD Modeling & Documentation

We create high-fidelity CAD models and 2D/3D technical drawings using industry-leading software such as:

  • SolidWorks
  • AutoCAD
  • Fusion 360
  • Revit / BIM 
  • Archicad
  • Navisworks

5. Quality Verification & Delivery

Each model and drawing undergoes dimensional verification, design review, and standard compliance checks before delivery in formats such as .STEP, .IGES, .STL, .DWG, and .RVT.

Technical Documentation Delivered

We deliver precise, engineering-grade technical documentation designed for industrial and mechanical applications:

2D Technical Drawings
Detailed mechanical schematics, assembly drawings, exploded views, cross-sections, and tolerancing according to GD&T (ASME Y14.5).

3D CAD Models
Parametric, solid, and surface models for design verification, FEA/CFD simulations, and digital prototyping — created using SolidWorks, Inventor, Fusion 360, and other mechanical CAD platforms.

Manufacturing-Ready Files
Engineering files optimized for:

  • CNC machining (.STEP, .IGES, .DXF)
  • Additive manufacturing / 3D printing (.STL, .AMF)
  • Sheet metal fabrication and mold design

Reverse-Engineered Assemblies
Full 3D models of assemblies with interrelated parts, including motion studies, material specifications, and BOMs (Bills of Materials).

Legacy Component Documentation
Digitized versions of outdated or undocumented parts for maintenance, upgrades, or remanufacturing, following modern engineering standards.

Legal Aspects of Reverse Engineering in the U.S.

At SCANM2, we understand that reverse engineering isn’t just a technical process — it’s one that must align with legal and ethical standards. We ensure our services are conducted in full compliance with U.S. laws and intellectual property guidelines.

Pricing & Customized Proposals

Pricing is customized based on scanning complexity, modeling details, and location. SCANM2 offers transparent, competitive quotes promptly.

Let’s Bring Your Engineering Vision to Life

Send us your component or project details today — and get a tailored proposal with full scope, lead time, and deliverables.

Whether you’re replacing a single part, documenting a full assembly, or preparing data for prototyping — SCANM2 is your precision partner in 3D scanning and reverse engineering.

Check our activity on:

When Is Reverse Engineering Essential Applications and Benefits Across Industries

Reverse engineering is the process of extracting technical and functional data from an existing physical object – without having access to the original design documentation. Using technologies such as 3D scanning, engineers can reconstruct a product, its functions, and the applied construction solutions.

Step-by-Step Reverse Engineering Process

  1. Object Acquisition
    The object is delivered to our office or scanned on-site by our team.
  2. 3D Scanning and Data Processing
    Depending on the size and complexity of the object, the scanning process takes just a few minutes or several hours. Our specialists then clean and merge the point cloud.
  3. 3D Model and Technical Documentation
    Engineers create a 3D model and reverse engineering documentation. The full set of materials is delivered to the client.
  4. Project Optimization
    The model can be adapted for manufacturing, improved, or made from new materials to increase durability and functionality.

Testing and Performance Verification
The final part is tested for fit and function – ensuring better performance and reduced operational costs.

3D Scanning in Reverse Engineering

Thanks to laser 3D scanning, it is possible to capture the geometry of an object with an accuracy of up to 0.01 mm. This data is used for CAD modeling, which greatly speeds up the process. This technology:

  • eliminates the need for manual measurements,
  • enables rapid prototyping,
  • allows precise fit of new parts.

Applications of Reverse Engineering in Various Industries

Reverse engineering is widely used across multiple sectors – from heavy industry to education and culture. Its versatility makes it an indispensable tool wherever there is a need to recreate, analyze, modernize, or preserve existing structures and products.

Industry and Manufacturing

Reverse engineering allows for the accurate reproduction of existing parts that are no longer available on the market or have worn out.

Applications:

  • Reproducing spare parts for machines and devices
  • Repair and renovation of outdated industrial systems
  • Optimization and redesign of existing components
  • Fault detection and failure analysis
  • Technical documentation for undocumented products

Architecture and Monument Preservation

3D scanning and BIM modeling technologies make it possible to create detailed spatial documentation of both modern and historical buildings.

Applications:

  • Digitizing monuments and conservation documentation
  • Creating technical drawings for renovations
  • Reconstructing architectural details
  • Generating plans for undocumented buildings
  • Preserving cultural heritage in digital form

Automotive and Aerospace

In the automotive and aerospace industries, reverse engineering is key to innovation and maintaining older vehicles and systems.

Applications:

  • Designing custom and tuning parts
  • Creating CAD models for aerodynamic simulations
  • Data recovery for vehicles lacking documentation
  • Competitor component analysis
  • Replication of hard-to-find aircraft or vehicle parts

Science and Education

In academic environments, reverse engineering supports practical skill development for students and researchers.

Applications:

  • Creating educational and scientific models (e.g., anatomical systems, machines)
  • Supporting design and mechanics courses
  • Developing analytical and engineering thinking
  • Simulations and virtual experiments
  • Interactive visualizations of complex data and processes

Art and Museology

In cultural institutions, this technology revolutionizes the way we protect and share tangible heritage.

Applications:

  • 3D scanning of artworks and museum artifacts
  • Creating digital archives and online exhibitions
  • Reconstructing damaged or missing fragments
  • Reproducing exhibits for mobile displays
  • Making collections accessible to a broader audience (e.g., in VR)

Check our activity on:

Examples of 3D Scanning Applications in Industry – The Key to Industry 4.0 and Production Digitalization

Discover how 3D scanning transforms modern industry. From prototyping to digital twins, learn five essential applications that are reshaping production, quality control, and innovation in the era of Industry 4.0.

3D Scanning as the Foundation of Modern Industry

3D scanning allows for the accurate digital replication of existing components, streamlining the product development cycle. Engineers can analyze the scanned models, perform simulations, and refine designs without relying on costly and time-consuming physical prototypes.

Design and Prototyping: From Idea to Execution


Digital Replication of Objects
3D scanning enables the creation of accurate 3D models of existing items, which is invaluable in the design process. For example, in the aerospace industry, engineers scan machine components to analyze wear or test new solutions in a virtual environment. As a result, prototyping becomes faster and more cost-effective — changes are made in the digital model instead of producing successive physical versions.


Example of Application:
In the automotive sector, 3D scanning is used to analyze the aerodynamics of car bodies. Vehicles are scanned and then tested in computer simulations, allowing for shape optimization without the need for expensive physical mock-ups.

Quality Control: Microscopic Precision


Technology Supporting Zero-Error Manufacturing


Traditional quality control methods often rely on manual measurements, which are time-consuming and prone to human error. 3D scanning replaces them with automated systems that compare the digital model of a product with its ideal reference.

This solution is particularly important in the production of precision components, such as bearings or medical implants, where even a millimeter deviation can prevent proper assembly.


Case Study:
In the electronics industry, 3D scanners are used to inspect printed circuit boards (PCBs). These systems detect micro-damages in the circuitry invisible to the naked eye, ensuring device reliability.

Spare Parts Management: Digital Archiving


A Lifeline for Legacy Machinery
Many companies struggle with a lack of technical documentation for older machines or difficulty sourcing replacement parts. 3D scanning allows the creation of digital copies of such components, which can then be 3D printed or used to produce casting molds.


Industry Example:
In the energy sector, 3D scanning is used to recreate turbine components that are no longer in production. Through digitization, companies avoid downtime and maintain operational continuity.

Modern Construction and Quality Assurance: Using 3D Scanning to Detect Errors and Optimize Processes


Contemporary construction and advanced architectural projects demand not only precision but also rapid verification of compliance with design intent. 3D scanning technology allows the detection of even the smallest structural errors or project discrepancies at an early stage.

It enables quick measurement of both large structural elements and fine details — such as irregular wall joints, floor unevenness, or installation misalignments. Digital object replication eliminates human error, shortens quality control time, and allows for rapid corrections before issues lead to costly delays or dismantling.


Examples of Application:


• Interior Architecture and Furniture Design: Stationary 3D scanners accurately map spaces — especially those with unusual shapes — enabling perfect fit of cabinetry, furniture, and installations without manual measurements.
• Historical Restoration and Industrial Conservation: Precise 3D documentation of intricate architectural details enables faithful reproduction and supports renovation planning.
• Custom and Replacement Manufacturing: In the machinery industry, 3D scanning facilitates the reconstruction of spare parts for equipment lacking technical documentation — especially vital for older or custom installations.

Digital Twins and Augmented Reality: The New Face of Industry


Merging the Physical and Virtual Worlds
3D scanning plays a crucial role in the creation of digital twins — virtual replicas of physical objects, machines, or entire production lines. These allow companies to simulate manufacturing processes, analyze component wear, and plan upgrades without interfering with the real-world environment.


Practical Applications:


• Virtual Testing and Training: With VR/AR representations of machines and workspaces, employees can train without the risk of damaging equipment — ideal for safety and operations teams.
• Infrastructure Management: Digital models of production facilities support spatial planning, assembly line reorganization, and resource control.
• Remote Inspections and Predictive Maintenance: Integrating 3D scan data with IoT sensors enables failure prediction and remote monitoring of machine and building conditions.

Strategic Advantages of 3D Scanning in Industry

3D scanning is not just a supporting tool — it is a strategic asset in digital transformation. From enhancing design workflows and minimizing production errors to enabling digital twins and preserving legacy systems, its applications are central to the future of smart manufacturing.

Companies that invest in 3D scanning gain a competitive advantage through greater efficiency, flexibility, and innovation readiness. As Industry 4.0 continues to evolve, 3D scanning remains a critical enabler of intelligent, connected, and data-driven production environments.

Check our activity on:

Scan to BIM in the United States – Practical Applications, Value, and Adoption Challenges

Scan to BIM is the process of converting spatial data captured via 3D laser scanning into a parametric Building Information Model (BIM). Laser scanners collect a dense point cloud – a digital representation of a building or environment – which is then processed using industry-standard software to produce accurate, geometry-based models.

These as-built BIM models reflect existing conditions and provide a reliable foundation for design, construction coordination, and facility management – especially in retrofit, renovation, and expansion projects.

When and Why to Use Scan to BIM?

Scan to BIM is particularly valuable in projects that demand high precision, data accuracy, and interdisciplinary coordination. Its applications span multiple project phases:

  • Pre-design phase – to capture existing buildings, infrastructure, or terrain accurately before schematic planning;
  • During construction – for progress tracking, quality assurance, and real-time verification of installations;
  • Post-construction – to produce as-built BIM models for turnover, facility maintenance, or digital twin integration.

The technology supports both greenfield developments and brownfield renovations across commercial, industrial, and institutional sectors.

Key Benefits for Project Stakeholders

Scan to BIM delivers measurable value to all participants in the project lifecycle:

  • For owners and developers:
    Gain greater visibility and control over the construction process. Minimize costly surprises by verifying real-world conditions against design documentation. As-built BIM models based on point cloud data provide strong deliverables for closeout packages and future renovation planning.
  • For architects and design teams:
    Work from current, verified geometry rather than outdated drawings or hand-measured plans. Design confidently in the context of true site conditions, reduce risk of spatial conflicts, and improve interdisciplinary coordination.
  • For contractors and construction managers:
    Use point cloud-based BIM to validate construction accuracy, detect deviations early, and minimize rework. Streamline logistics and gain a real-time record of work completed.
  • For facility managers and building operators:
    As-built BIM models serve as a long-term asset for lifecycle management. They can integrate with BMS (Building Management Systems), CAFM tools, and IoT platforms. This facilitates proactive maintenance, space management, and paves the way toward digital twin implementation.

Scan to BIM Adoption in the U.S. – State of the Market and Challenges

The adoption of Scan to BIM in the United States is transforming the Architecture, Engineering, and Construction (AEC) industry by enhancing project accuracy, efficiency, and collaboration. However, several challenges unique to the U.S. market influence its widespread implementation.​ 

1. High Initial Investment

Acquiring 3D laser scanning equipment and associated software requires significant upfront capital. This financial commitment can be particularly burdensome for small to medium-sized enterprises (SMEs), potentially hindering their ability to adopt Scan to BIM technologies. ​ 

2. Technological Complexity and Integration Issues

Integrating Scan to BIM into existing workflows presents technical challenges, including data processing complexities and compatibility issues with current systems. The need for specialized knowledge to manage and interpret large datasets can deter firms from embracing this technology. ​ 

3. Data Management and Storage

The substantial volume of data generated by 3D laser scanning necessitates robust storage solutions and efficient data management practices. Without proper infrastructure, handling and processing this data can become a bottleneck, impacting project timelines and costs. ​

4. Standardization and Interoperability

The absence of universally accepted standards for Scan to BIM processes in the U.S. leads to inconsistencies in data formats and modeling practices. This lack of standardization complicates collaboration among stakeholders and can result in inefficiencies. ​

5. Skilled Workforce Shortage

There is a notable shortage of professionals proficient in both 3D laser scanning and BIM technologies. This skills gap poses a significant barrier to adoption, as firms may struggle to find or train personnel capable of effectively utilizing Scan to BIM processes. ​

6. Regulatory and Compliance Challenges

Navigating the complex regulatory environment in the U.S., where BIM mandates vary across federal, state, and local levels, adds another layer of difficulty. Firms must stay informed about and comply with these varying requirements, which can be resource-intensive. ​

Addressing these challenges requires strategic investments in technology, workforce development, and the establishment of standardized practices to fully leverage the benefits of Scan to BIM in the U.S. construction industry.

7. Outsourcing as a Strategic Solution

One effective way to address several of the challenges outlined above is through outsourcing Scan to BIM services to specialized external providers.

Outsourcing can help firms:

  • Avoid high upfront costs associated with scanning equipment and software licensing by leveraging providers that already own and operate industry-standard hardware and platforms;
  • Bypass technical complexity by relying on experts who are experienced in processing point clouds, managing large datasets, and delivering clean, structured BIM models;
  • Bridge the talent gap, gaining access to trained professionals without the need for internal hiring or extensive training;
  • Ensure consistency by partnering with firms that follow established BIM standards (e.g., LOD, IFC, COBie) and have proven QA/QC workflows;
  • Accelerate delivery timelines without overburdening internal teams, allowing project stakeholders to focus on design coordination, permitting, and execution.

For many general contractors, architects, and real estate owners across the U.S., outsourcing has become a practical way to integrate Scan to BIM into their workflows without sacrificing quality or scalability.

Whether used on a per-project basis or as part of a long-term strategy, outsourcing offers flexibility and access to expertise that can ease adoption and maximize ROI.

Conclusion

As the U.S. AEC industry continues to evolve toward greater digitalization, Scan to BIM has emerged as a critical enabler of precision, efficiency, and lifecycle insight. While adoption is growing, widespread implementation is still hindered by financial, technical, and organizational barriers — from high equipment costs to workforce limitations and inconsistent standards.

For firms seeking to leverage the full value of Scan to BIM without overextending internal resources, outsourcing offers a scalable and cost-effective path forward. By partnering with experienced providers, project teams can reduce risk, improve data quality, and accelerate decision-making at every stage of the building lifecycle.

Ultimately, adopting Scan to BIM isn’t just about keeping up with technology — it’s about building smarter, faster, and with greater confidence in every square foot delivered.

Check our activity on:

Why 3D Scanning + BIM = Better Projects, Lower Costs, Less Stress

Developers, architects, and contractors all face the same chronic problems: outdated plans, design clashes, change orders, and construction delays. Most of these issues stem from one root cause — inaccurate or missing real-world data. Without precise site conditions, the best-designed projects can run into costly surprises. Traditional measurement methods are slow and prone to human error, and working “based on assumptions” is a recipe for blown budgets and sleepless nights.

How BIM Verification with 3D Scanning Saves Money

When you combine 3D laser scanning with Building Information Modeling (BIM), you gain a powerful tool for design validation and construction quality control. Laser scanners capture a highly accurate point cloud of the real-world conditions. That data is imported into BIM software, allowing you to compare the as-is vs. as-designed models in real time.

Benefits:

  • Detect clashes between MEP, structural, and architectural elements before construction,
  • Reduce change orders and avoid rework,
  • Spot deviations from plans instantly,
  • Speed up approvals and inspections,
  • Gain trust with stakeholders through reliable data.

Studies show that integrating 3D scanning into BIM workflows can reduce construction costs by 5–15% and accelerate project timelines by 10–30%.

3D Scanning as a Tool for Prevention and Documentation

Laser scanning isn’t just for fancy visuals — it’s a documentation tool that acts like a “black box” of your project.

You can use it:

  • Before construction to document site conditions, existing structures, and create accurate terrain models that serve as the base for design and planning.
  • During construction to monitor progress, verify that installations match design specs, and ensure construction milestones are met without costly errors.
  • After construction for as-built documentation, which is critical for facility management, renovation planning, or future modifications.

Every scan is a digital snapshot of your project, capturing millimeter-level accuracy — protecting your investment from claims, disputes, or miscommunication.

When and How to Use 3D Scanning Throughout the Project Lifecycle

3D scanning can be strategically applied at multiple phases of a project. Here’s how:

  • Concept & Design Phase: Use laser scanning to capture existing conditions and reduce the risk of design based on outdated or incorrect information.
  • Pre-construction Phase: Verify terrain models and foundation readiness to avoid delays due to unexpected site conditions.
  • Structural Completion: Ensure that beams, columns, and critical elements match tolerances before closing up walls or ceilings.
  • MEP Installation: Identify clashes or misaligned installations early by comparing the scan to the BIM model.
  • Post-construction: Create a true as-built model for handover to facility managers or to use in digital twin systems.

Proactive scanning at these stages helps you mitigate risk, avoid rework, and build a reliable digital trail of your project’s progress.

When Should You Start Scanning?

Ideally — as early as possible. A pre-construction scan can form the basis for your BIM model and help flag potential issues long before they become costly.

Already mid-project? Schedule scans after key construction phases like:

  • foundation,
  • structural frame,
  • MEP installation,
  • roof closure.

These milestones are perfect for verifying progress and preventing surprises later.

Why Work with SCANM2?

At SCANM2, we specialize in mobile 3D laser scanning and advanced point cloud processing for projects across the United States. Our team delivers BIM-ready documentation tailored to your needs, compatible with Revit, AutoCAD, Navisworks, ArchiCAD, and other leading platforms.

What Sets Us Apart:

  • We use professional-grade laser scanners from top global brands to capture millions of data points with millimeter accuracy.
  • Our in-house specialists convert raw point clouds into clean, structured 3D models and 2D documentation.
  • We offer deliverables at LOD 100–400, depending on your project stage and scope.

From noise reduction and registration to surface reconstruction and clash analysis, we handle every step of point cloud processing — ensuring you get precise, reliable, and usable data for design, verification, or facility management.

Whether you’re working on an industrial facility, commercial building, or infrastructure project, we help you reduce risk and stay on schedule with high-quality 3D data.

Check our activity on:

Stages of the Reverse Engineering Process – from 3D Scanning to Final Product

Reverse engineering is increasingly becoming a key component of modern production strategies, allowing companies to quickly and accurately recreate unavailable or obsolete components. Advanced 3D scanning and CAD software enable restoration of machinery functionality, extension of their operational lifespan, and improvement in product quality.

Stages of the Reverse Engineering Process

1. 3D Scanning of the Object

The first step is the accurate 3D scanning of a physical object using advanced laser or structured-light scanners. This allows precise mapping of even the most complex geometries with accuracy up to 0.05 mm.

2. Creating a Point Cloud

Scanning data is transformed into a point cloud – a set of XYZ coordinates describing the surface of the object. Software such as Autodesk ReCap or FARO Scene helps to clean the data by eliminating noise and unnecessary points.

3. Converting Data to a Mesh Model

The point cloud is converted into a mesh model, commonly saved in STL format. Programs such as Autodesk Fusion 360, Geomagic Wrap, or MeshLab are used for further mesh optimization.

4. CAD Modeling

The mesh model is transformed into a precise, parametric CAD model. Tools like SolidWorks, CATIA, or Siemens NX enable detailed geometry management, allowing adjustments to new requirements or materials.

5. Analysis and Simulation

At this stage, Finite Element Method (FEM) simulations are conducted using software such as Ansys, SolidWorks Simulation, or Autodesk Inventor Nastran. This evaluates the structural integrity of the design before physical production.

6. Prototyping and Testing

Prototypes are produced using CNC technology or 3D printing (DMLS, SLM). Testing verifies mechanical properties and enables necessary adjustments before mass production.

7. Mass Production

Following successful tests, the project proceeds to mass production, where the quality meets or exceeds that of the original product.

When is Reverse Engineering Beneficial?

Reverse engineering is particularly effective when:

  • Original technical documentation is missing,
  • The original manufacturer has discontinued the part,
  • Existing designs require modernization,
  • Rapid solutions to unavailable components are needed.

It is especially relevant in sectors such as:

  • Architecture and construction,
  • Industrial manufacturing,
  • Energy,
  • Aerospace and automotive,
  • Medicine.

Reverse Engineering Project Management

Effective project management is crucial to the success of reverse engineering processes. Tools such as Jira, Trello, or Asana facilitate team organization, progress tracking, and documentation management. Additionally, Product Lifecycle Management (PLM) platforms like Siemens Teamcenter or PTC Windchill support managing the product lifecycle from conception through to production.

Costs and Benefits of Reverse Engineering

Costs for reverse engineering services are individually determined based on the project’s size and complexity. It is a cost-effective solution that reduces overall expenses, shortens project timelines, and resolves problems related to unavailable components.

Summary

Reverse engineering, combined with 3D scanning and modern CAD software, provides companies with robust tools to overcome challenges posed by missing parts or documentation. This process enables rapid reproduction, modernization, and optimization of complex components.

Utilizing reverse engineering services saves time, reduces production costs significantly, and accelerates project delivery, thereby directly enhancing company competitiveness. Whether you need a digital CAD model, precise 3D prototypes, or mass production, reverse engineering provides tailored and reliable market-ready solutions.

Check our activity on:

Quality Control of Parts Using 3D Scanning

Modern 3D scanning technologies are revolutionizing quality control processes in industry, especially in sectors that require precise production, such as automotive, construction, and machinery manufacturing.

With the application of reverse engineering, 3D scanning allows for the accurate replication of real objects into digital models that can be precisely compared with original CAD designs, and any discrepancies can be quickly detected and corrected.

3D Scanning Process in Quality Control

3D scanning allows for the capture of highly detailed data regarding the geometry of an object in the form of a point cloud, which is particularly useful in verification and quality control processes. Here are the main steps of this process:

  1. Scanning the object: 3D scanning is carried out using laser scanners that collect surface data of the object, creating a three-dimensional map. This 3D model allows for detailed analysis of the object’s geometry.
  2. Comparison with CAD model: The scanned model is compared with the digital CAD model, which helps detect any deviations from the design. These deviations can pertain to dimensions, shape, or positioning of components.
  3. Generating reports: Based on the comparison of scans and the CAD model, detailed reports are generated, highlighting areas where differences exist between the real object and the design. These reports are crucial in the quality audit process and allow for the quick identification of issues.
  4. Deviation analysis: When deviations are detected, their impact on the functionality of the part is analyzed. These deviations may include production defects, assembly errors, or other issues that could affect the final product’s quality.
  5. Production optimization: 3D scanning, in conjunction with reverse engineering, enables faster detection of inconsistencies in the production process, leading to production optimization, error reduction, and time and cost savings.

Advantages of 3D Scanning in Quality Control

  • Precise measurements: 3D scanning provides unparalleled measurement accuracy, allowing even the smallest deviations to be detected, which could be overlooked using traditional measurement methods.
  • Real-time verification: 3D scanning enables immediate verification of production quality. By continuously monitoring the process, errors can be quickly identified and corrected, which leads to greater production efficiency.
  • Process automation: 3D scanning, combined with CAD and BIM technologies, allows for the automatic generation of reports and detection of inconsistencies, reducing verification time and increasing assessment accuracy.
  • Cost efficiency: By quickly detecting errors and imperfections, 3D scanning helps reduce production costs, as costly corrections don’t need to be made later in the process.

Examples of 3D Scanning Applications in Quality Control in Various Industries

3D scanning finds widespread application in quality control across various industries, enabling precise checks of dimensions, shapes, and positioning of components against their designs. Here are a few examples of how this technology is used in quality verification in key industries:

  1. Construction
    In construction, 3D scanning plays a crucial role in quality control of structures. Regular scanning of buildings during construction allows for the comparison of the actual state with the project documentation. For instance, scanning foundations, load-bearing walls, and other structural elements allows for verification of their geometry and positioning against the original design. If discrepancies are detected, such as deformations or improper placement of elements, corrections can be made quickly. This type of scanning is also used in the final stages of construction, where comparing the actual state with the design helps verify the correctness of all construction work.
  2. Machinery and Equipment Manufacturing
    In machinery and equipment manufacturing, where precise fitting of parts is essential, 3D scanning is used to control the dimensions and geometry of components. Scanning allows for the accurate verification of machine parts, such as housings, mechanisms, or engines, ensuring they meet quality and design requirements. If any deviations are detected, for example, in the assembly layout or shape of components, immediate corrective actions can be taken, preventing potential failures and production errors.
  3. Renovation of Buildings and Structures
    In the renovation of buildings, especially historic ones, 3D scanning enables the precise replication of existing structural elements, which is essential for quality control of renovation work. 3D scanning allows for the comparison of the actual state of the building with its original design or documentation. This technology helps detect any deviations that may indicate inaccuracies in execution, such as surface irregularities or errors in reproducing architectural details. This enables necessary corrections to be made before completing the renovation.
  4. Automotive Industry
    In the automotive industry, where precise quality of parts is crucial for vehicle safety and performance, 3D scanning is used to control the quality of components such as engines, exhaust systems, suspension, and bodywork. Through 3D scanning, it is possible to accurately compare the dimensions of parts with CAD designs, detecting microscopic deviations that could impact the vehicle’s performance. Scanning also allows for faster verification after assembly, minimizing the risk of production errors and improving the overall quality of products.
  5. Electronics Manufacturing
    In quality control within the electronics industry, 3D scanning allows for detailed analysis of components, such as printed circuit boards, device housings, and integrated circuits. This technology enables precise checking of dimensions and geometry of electronic parts, ensuring they align with designs. Detecting microscopic defects in production, such as cracks or improper placement of components, allows for their prompt removal, improving the quality of the final products and reducing the risk of failure.

Conclusion

3D scanning in quality control enables precise comparison of the actual state with the design in various industries, which leads to the detection of production errors and optimization of processes. In each of the industries mentioned, from automotive to construction and machinery manufacturing, this technology is a key tool in ensuring high-quality products and improving production efficiency.

Check our activity on:

How to Create a CAD Model from a 3D Scan?

Reverse engineering 3D scan is not just about scanning physical objects – it’s a complete digital workflow that converts real-world geometry into editable, precise CAD (Computer-Aided Design) data.

This process is crucial for product development, part replication, or modification in both industrial and engineering contexts. Below is a step-by-step guide on how to transform a 3D scan into a functional CAD model, with the best tools and technologies available today.

Step 1: 3D Scanning and Point Cloud Acquisition

The reverse engineering process begins with 3D scanning services USA that capture millions of measurement points on the surface of a physical part. This data is compiled into what’s known as a point cloud – a 3D map of XYZ coordinates.

Depending on the object and industry, different scanning technologies may be used:

  • Laser 3D scanners – ideal for large objects or outdoor scanning with high accuracy.
  • Structured light scanners – perfect for capturing small parts and intricate surfaces.
  • Handheld 3D scanners – flexible and suitable for complex geometries in the field.
  • Photogrammetry – useful for combining multiple photos into a 3D model (common in heritage or architecture).

The result is a dense point cloud that accurately represents the scanned object’s shape.

Step 2: Processing the Point Cloud with Autodesk ReCap

Once the scan is complete, the next step is to process the point cloud. In the Autodesk ecosystem, Autodesk ReCap is the go-to tool for:

  • Importing scan data from various 3D scanners,
  • Cleaning the point cloud (removing noise and irrelevant data),
  • Aligning and merging multiple scans,
  • Scaling and orienting the model for further use.

This step is critical to prepare the data for mesh generation or direct CAD modeling.

Step 3: Converting the Point Cloud to a Mesh

The optimized point cloud is then converted into a mesh model (usually in STL format). This surface model is made of thousands of tiny triangles that represent the object’s shape.

Autodesk tools such as Fusion 360 can handle this conversion internally, but there are also other software options:

  • MeshLab – open-source mesh editor and viewer,
  • Artec Studio – professional mesh post-processing software,
  • Geomagic Wrap – high-end solution for precise mesh conversion,
  • Autodesk Meshmixer – user-friendly mesh editing tool.

The mesh model serves as the base for CAD conversion or 3D printing.

Step 4: Creating the CAD Model (Surfacing & Solid Modeling)

To turn the mesh into a usable reverse engineering CAD model, it must be translated into solid or surface geometry.

In Autodesk Fusion 360, users can:

  • Use the “Mesh to BRep” function to convert mesh into solid geometry,
  • Use cross-sectional profiles to recreate the surfaces manually (surfacing),
  • Combine mesh and parametric features in a hybrid workflow.

For advanced engineering, the following CAD platforms may also be used:

  • Autodesk Inventor – mechanical engineering and product design,
  • SolidWorks – widely adopted in manufacturing and prototyping,
  • CATIA – used in aerospace and automotive industries,
  • Siemens NX – for enterprise-level engineering environments.

Step 5: Finalizing and Applying the CAD Model

The final reverse engineering CAD model can be used for a variety of applications:

  • CNC machining or 3D printing,
  • Finite Element Analysis (FEA),
  • Digital twin modeling for IoT integration,
  • PLM/ERP system integration,
  • Legacy part redesign and documentation.

Why Use Professional Reverse Engineering Services?

Working with a professional reverse engineering company USA helps reduce design time, lower costs, and improve product quality. These services are especially valuable when original part drawings or CAD files are unavailable.

If you’re wondering what is reverse engineering, how to convert 3D scans to CAD models, or are simply searching for 3D scanning services near me, partnering with a specialized provider is the fastest way to transform real-world objects into digital assets ready for manufacturing or simulation.

Whether you’re digitizing industrial parts, retrofitting existing systems, or creating accurate digital twins – reverse engineering 3D scanning is the bridge between the physical and the digital world.

Check our activity on: