What is 3D Coordinate Measurement? A Key Tool for Architects and Interior Designers

In modern architecture and interior design, access to precise spatial data is critical. Designers, architects, and contractors need reliable measurements to create accurate digital models, plan renovations, and avoid costly mistakes. 3D measurement technologies have become indispensable, not only in large infrastructure projects but also in everyday architectural workflows. One of the most versatile and accessible tools for this purpose is 3D laser scanning.
What are 3D coordinate measurements?
3D coordinate measurement refers to the process of capturing the exact shape and dimensions of a real-world object or environment in digital form. The result is a digital dataset that represents the geometry of the scanned subject in three dimensions (X, Y, Z). While there are various technologies for obtaining such data, in the AEC (Architecture, Engineering, Construction) industry, the most practical solution is laser scanning rather than coordinate measuring machines (CMM), which are more suitable for industrial manufacturing.
Why is laser scanning the preferred method? Primarily due to its flexibility, mobility, and efficiency. Unlike CMMs, which require controlled environments and are typically used in industrial settings, laser scanners can operate directly on-site – in historic buildings, residential units, large industrial halls, or active construction zones. The process is fast, non-contact, and captures a high volume of spatial data in a short time. The resulting point clouds are compatible with common design tools, including BIM platforms, enabling immediate use in design workflows. For these reasons, laser scanning has become the industry standard for spatial documentation and project planning in modern construction.

How does laser scanning work?
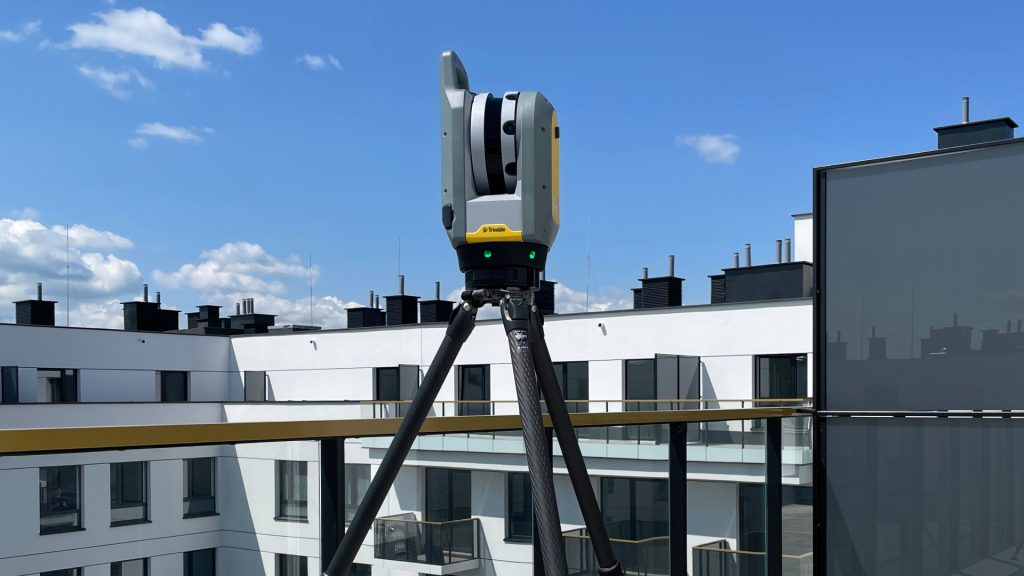
Laser scanners project beams of light onto surfaces and measure the time it takes for the light to return. This time-of-flight principle allows the scanner to determine the distance to each point, creating a 3D map known as a point cloud. The point cloud is made up of millions of points and provides a highly detailed representation of the scanned space. Accuracy typically ranges from 3 to 5 mm – sufficient for most architectural and interior applications.
Laser scanning is contactless, fast, and can be performed in complex environments such as historical buildings, construction sites, and tight interiors. The collected data can be used to generate 2D drawings, 3D models, or be directly imported into BIM platforms for further analysis and design.
At SCANM2, we use top-tier technology, including scanners from FARO, Trimble and Leica, to deliver professional 3D measurement services tailored to the needs of architects and designers. Our services include:
- Precise laser scanning of interiors and facades,
- Generation of detailed 2D documentation (plans, sections, elevations),
- Creation of BIM models in formats such as IFC,
- Measurement and analysis of architectural and structural geometry.
Why is this important for architects and interior designers?
- Precision in every detail
3D measurement allows for the accurate representation of all curves, deviations, and irregularities – which is crucial when working on historical or non-standard structures. It eliminates the risk of measurement errors typical of traditional methods. We offer accuracy at the level of 3–5 mm, which in most cases ensures complete project precision. - Time savings during the inventory phase
Manual measurements can take days. A 3D scan can collect data within just a few hours, allowing immediate progress with project documentation. - Integration with BIM
3D measurement data forms the foundation for building information models (BIM). It facilitates planning, coordination with engineers, and clash detection. - Complete project documentation
Based on the scans, ScanM2 delivers:
2D documentation:
– floor plans and sections,
– elevations,
– wall unfoldings,
– installation layouts and technical elements,
– other necessary project documentation.
3D documentation:
– point clouds ready for use in Archicad, AutoCAD, Revit, SketchUp,
– 3D models for visualization or geometric analysis.
How does the process work with Scan M2?
- Initial consultation – We discuss your project and choose the best scanning method.
- On-site scanning – Our team performs a 3D scan of the interior, facade, ceiling, or installations.
- Data processing – We generate point clouds, models, and documentation.
- Delivery – You receive a ready-to-use digital package customized for your design software.
Applications of 3D Coordinate Measurement in Architecture
- As-built documentation – for residential, commercial, and industrial properties.
- Renovation and remodeling – accurate data ensures confident decision-making.
- Creating BIM-ready models – enhance collaboration and minimize errors.
- Technical drawings for permits and execution – aligned with official requirements.
- Interior fit-outs and technical installations – precise coordination of HVAC, plumbing, and electrical elements.
FAQ
What is 3D coordinate measurement?
3D coordinate measurement is the process of capturing real-world objects or environments in digital form with exact dimensions and geometry. It creates an accurate 3D representation for use in design, planning, and analysis.
How accurate is 3D laser scanning?
Modern laser scanning technology achieves an accuracy of 3–5 mm, which is sufficient for architectural, interior design, and construction applications.
Why use laser scanning instead of traditional measurements?
Laser scanning saves time, reduces errors, and provides detailed data for complex structures. Unlike manual measurements, it captures millions of points within minutes and integrates seamlessly with BIM tools.
Can laser scanning be used for small projects?
Yes. 3D laser scanning is suitable for projects of all sizes, from small apartment renovations to large commercial or industrial developments.
How does ScanM2 deliver results?
Our process includes on-site scanning, data processing, and delivery of point clouds, 2D drawings, and BIM models compatible with ArchiCAD, AutoCAD, Revit, and other platforms.
Why work with Scan M2?
At SCANM2, we combine cutting-edge technology with real-world experience in architecture and engineering. Our clients include architects, design studios, and interior engineers who rely on us for:
- Time savings of up to 40% on survey and modeling,
- High-accuracy data (up to ±1 mm),
- Full compatibility with BIM workflows,
- Reliable documentation for planning, approvals, and execution.
Conclusion
3D coordinate measurement is more than just technology – it’s a practical tool that enhances precision, reduces risk, and accelerates your design process. With complete documentation and accurate models, you can plan renovations, reconstructions, and installations with confidence.
Trust SCANM2 – your partner in professional building surveys and digital modeling.
👉 Book a free consultation and see how we can support your architectural or engineering project!


